How to Close Your Above Ground Pool for Winter
Summer is over and Winter is coming. It is time to think about winterizing your above ground pool. If you have never closed an above ground pool before, we will guide you through the steps.
Why Do I Have to Winterize My Pool?
While not everyone has to winterize their pools, people living in colder areas with harsh winters want to close their pools properly. This not only prolongs the life of the pool but also allows for less work during pool opening in the spring.
During Fall leaves and other debris fall into the pool, settling on the bottom. This can cause staining of the liner and the decomposing leaves throw off the water balance eventually leading to algae growth. Come spring this means scooping, scooping, scooping on top of vacuuming, and a heavy dose of shock and algaecide.
Why create so much work when you can simply avoid it by closing your pool properly?!
How to Winterize My Pool?
In order to winterize your pool, you want to ensure it is clean, clear, and balanced. Skim the top and vacuum up all the debris off of the bottom. Next, it is time to winterize your pump, filter, and heater if you use one. Depending on your filter and set up steps may vary.
Step 1 Lower Water Level Down to the Bottom Edge of the Skimmer
If you use safety or a mesh cover, lower the water level to 1 foot under the skimmer.
Turn off the pump. Then set your filter so that it is discharging out of the pool. This will vary, depending on the type of filter you have.
I) If you have a multiport valve set it to backwash or waste
II) If you don’t have a multiport valve open the drain on your filter. You may want to connect a hose to the drain to direct water away from where you are working.
Turn the pump back on and start pumping water out of your pool. Make sure to stop using your pump as soon as you hear it sucking air. To lower the rest of the water to the desired level, you can either use the Siphon Method, attach a backwash hose to the return or use a submersible pump and hose.
Step 2 Insert Plugs, Plates or Gizzmos
Replace the eyeball in the return with a winterizing plug. Cover up the skimmer. We recommend using a steel plate to not only help keep ice out of the skimmer but also minimize water loss over the winter. It also helps to prevent ice damage to the wall and skimmer.
Some people use what is called a Gizzmo in the skimmer but check with the skimmer manufacturer before doing so, as we find many above ground skimmers crack from this method. Another method uses a special face plate on the skimmer, which allows you to use a plastic lid that snaps in place. Most pool professionals prefer the stainless steel plate method.
Step 3 Winterize Your Pump and Filter System
Disconnect the hoses from the skimmer, return, pump, and filter.
Open all the drain plugs on the pump and filter to let all water drain out of the system.
Open up the pump, remove the pump basket to rinse off any leftover debris, bugs, or leaves. Then use the pump basket as storage for all plugs. This will ensure that you have everything together when you open your pool come spring.
For Cartridge or DE Filters; open the filter and remove the cartridge or DE grid. Clean the filter and store it in a clean dry place (make sure not to allow mice to make their nests there.) Now you can either put the pump and filter housing in the shed or cover it for the winter.
For sand filters, place the multiport valve on the “Winter/Closed” position. If yours doesn’t have one, push down on the handle and leave the valve halfway between any two settings. Now you should remove the pump and bring it inside for the winter or a shed so the pump doesn’t get hit directly by the elements.
We do not recommend moving sand filters as you can damage the filter internals (lateral assembly). It is best to try and cover the sand filter for the duration of the Winter. You can use heavy-duty contractor’s bags.
Step 4 Winterize Other Equipment or Piping
If you have a heater or any piping that is underground you need to winterize those by blowing out the lines with a blower and adding a small amount of Antifreeze to the lines. This will prevent pipes from bursting due to freezing water.
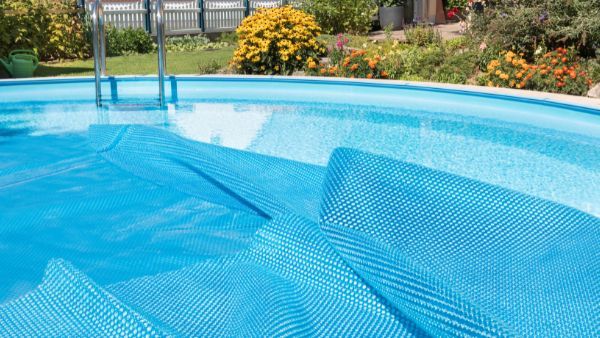
Step 5 Winter Pillow
You are almost finished. Now it is time to blow up your winterizing pillow and drop it into the center of your pool. Use either the Pool Pillow Pal to attach it to your cover or attach two strings to each side of the pillow and tie it to the top rail of your pool.
Why do I need a pool pillow?
A pool pillow helps to compensate for the expansion of ice and instead of pushing against your walls, it will exert pressure inward towards the pillow. Additionally, it helps to push water on top of the cover to the edge of the pool, making it easier to pump it off and remove leaves.
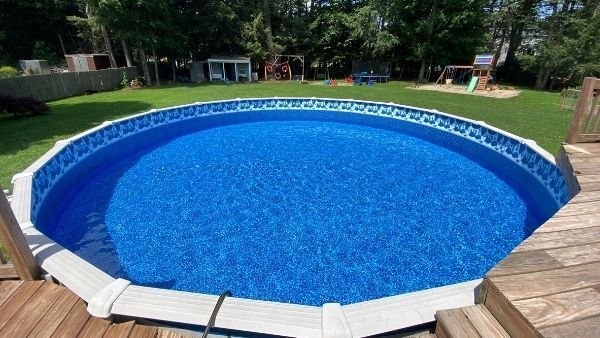
Step 6 Putting on the Winter Cover
Winter covers are necessary to keep dirt, leaves, and other debris out of your pool. Pull the pool cover/safety cover over your pool. The standard pool cover is selected based on pool size (see below) and is secured via a cable and winch. Once the cable is wound through the grommets of the cover and attached to the winch, twist the winch as tight as you can.
The safety cover is attached to professionally installed anchors.
How Big Should My Winter Cover Be?
We find that a pool cover that is 4 feet larger than the pool size fits best. So if you have a 24’ Round pool the actual cover size should be 28’. This gives you extra slack to account for the water level, the pillow, and your top rail. If you are installing a standard cover you should not be pulling it tight like a trampoline.
Now your pool is closed and you finally don’t have to worry about your pool for the winter! Not so fast!
Step 7 Maintaining My Pool During Winter/Early Spring
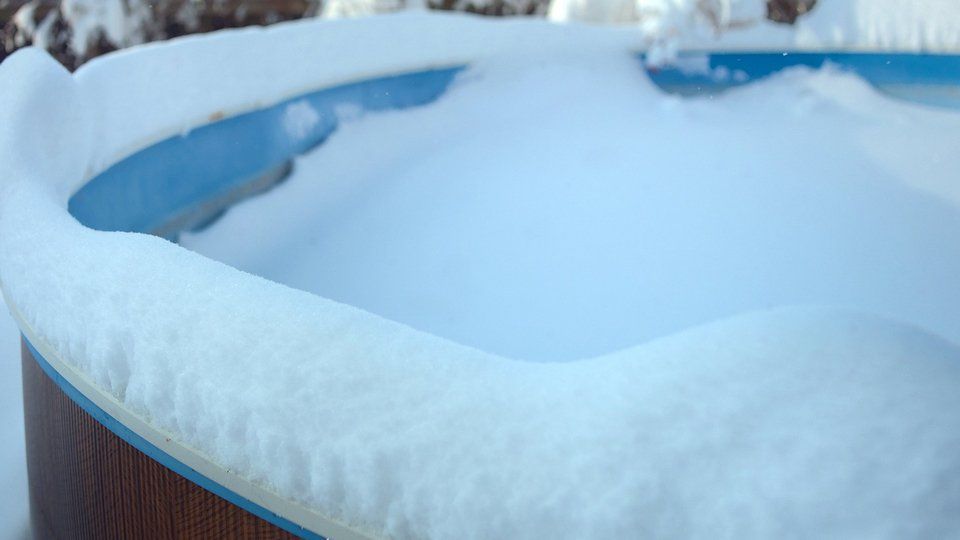
Why Do I Have to Maintain My Pool in The Winter?
During the winter leaves, debris, and snow will accumulate on top of your cover. This will cause pool water to get pushed out of the pool, which can significantly lower your water levels and potentially cause damage to your pool wall and winter cover.
We want to avoid this by removing leaves, snow, and water from the cover in the fall. To remove leaves it's best to use a skimmer net or leaf net. A leaf net helps to easily remove leaves from the cover.
Next, you want to pump off rainwater regularly to keep the weight off of the cover. Once it starts snowing remove snow from the cover as well. When the snow melts in the spring be sure to pump off the cover again. All these proactive steps can help you open your pool with ease in the Spring.
If you need help winterizing your above ground pool
contact us or visit our store at 3 Newton Junction Road in Kingston, NH.
Share
You might also like